A complete, professional rich of features backup program for OS/2!
This product, although not being developed/updated/sold since long time, it is luckily available as "Abandonware" software on many dedicated sites on world wide web.
Help us and contribute to eCSoft/2 site hosting
Self-installing program. Run INSTALL.EXE. See below for download link(s).
Following ones are the download links for manual installation:
| Sytos Plus File Backup Manager for OS/2 v. 1.33 (7/1/1992, Sytron Corporation) | Readme/What's new |
------------------------------------------------------
1. NEW FEATURES
------------------------------------------------------
a. PROGRESS INDICATOR
The percentage complete indicator that is
displayed in the Status window during a Backup
or Move procedure has been enhanced with a
graphical progress indicator. The
horizontal bar indicator increments as the
Backup or Move Procedure executes.
b. IBM PS/2 REWRITABLE OPTICAL DRIVE SUPPORT
The IBM PS/2 Rewritable Optical Drive can be
configured as a backup device for Sytos Plus in
two ways: as a removable logical device or as a
fixed logical device.
There are two different Sytos Plus device
drivers for the two configurations:
Removable Logical Device: IBM Optical-Entire
Fixed Logical Device: IBM Optical-Partial
NOTE: The two drivers are not compatible.
Media that has been used for backing up to
the default directory (root directory) on
an optical drive using the "IBM Optical-
Partial" driver must be reformatted from
OS/2 before it can be used on an optical
drive using the "IBM Optical-Entire"
driver.
The next two sections provide instructions
for configuring an Optical Drive.
1. Configuring the Optical Drive as a Removable
Logical Device
To configure an Optical Drive as a removable
logical device, refer to the Section
"Removable Logical Device Support: IBM PS/2
3.5" Rewritable Optical Drive" in this
README file.
When an Optical Drive is configured as a
removable logical device, Sytos Plus
provides the following support:
- Multiple device: More than one Optical
Drive can be used for a single Procedure.
- Multiple media: When end of media is
reached, Sytos Plus prompts for new
media.
NOTE: An Optical Drive configured as a
removable drive does not require formatted
media. However, backups to unformatted
media take longer than backups to
formatted media.
2. Configuring the Optical Drive as a Fixed
Logical Device
To configure an Optical Drive as a fixed
logical device, refer to the section
"Fixed Logical Device" in this README file.
When an Optical Drive is configured as a
fixed logical device, Sytos Plus provides
the following support:
- Multiple fixed logical devices: The
optical drive can be used with other
devices such as fixed disk, network
drives, or other Optical Drives configured
as fixed devices. (Floppy devices are not
supported.)
- Fixed media: You must use formatted media
and must allocate enough space on the
media for the files you backup. You
do not have the option of inserting new
media.
NOTE: You must use formatted media. You
may then partition it, or use the entire
media.
c. REMOVABLE LOGICAL DEVICE SUPPORT: IBM PS/2
3.5" REWRITABLE OPTICAL DRIVE
This release of Sytos Plus has the
capability to Backup to and Restore from the
IBM PS/2 3.5" Rewritable Optical Drive
(Rewritable Optical Drive). Before you can
configure the drive in Sytos Plus as a backup
device, it must be accessible from your
operating System. (To verify that you can
change to the drive, type the assigned drive
letter from the system prompt.)
Two additional device drivers, SCSI.SYS and
OPTICAL.SYS must already be installed to access
the device. If you have not installed these
device drivers, refer to the IBM Personal
System/2 Rewritable Optical Drive Setup
Instructions that come with the device.
To configure the Rewritable Optical Drive as a
Sytos Plus backup device, ensure that the
device is powered on and has media inserted.
Media does not have to be formatted; however,
backups to unformatted media will take longer
than backups to formatted media.
(continued on next screen)
Follow these steps.
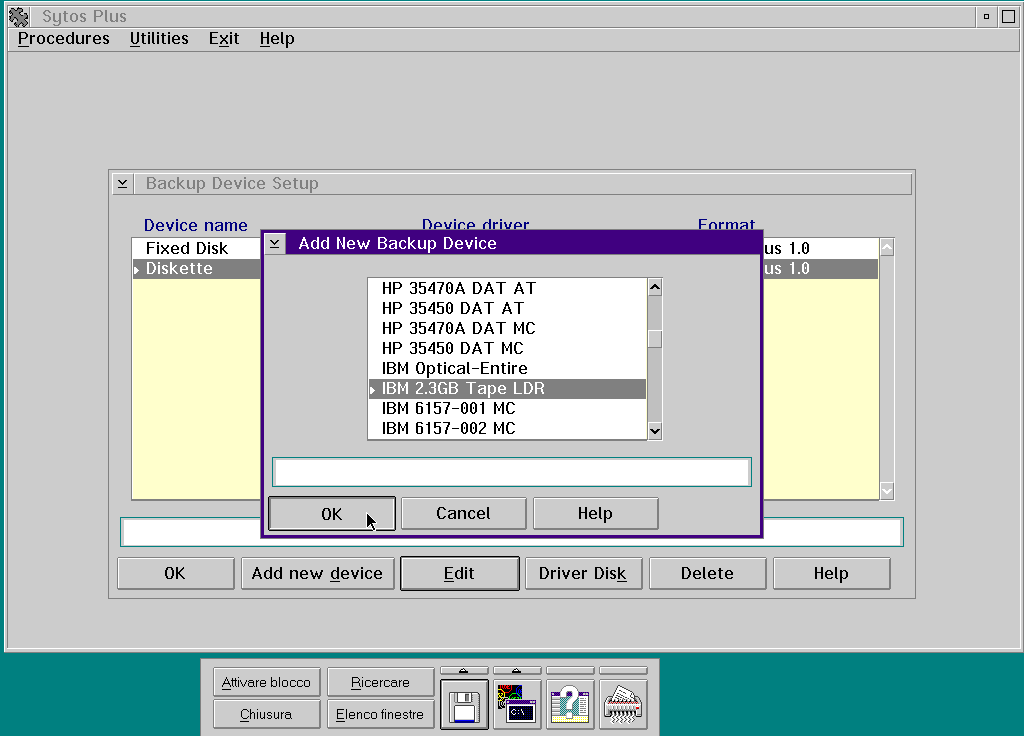
1. Select "Add new device" under "Utilities:
Backup Device Setup". Refer to the
"Utilities: Backup Device Setup" section
in the User's Guide to add the backup
device.
2. Select one or more Rewritable Optical
Drives from the drive list.
3. Select OK.
Multiple Rewritable Optical Drives can be
cascaded; that is, several drives can be used
for a single procedure. This is useful when
performing Unattended Backups for a large
number of files.
If your backup set does not fit on one media,
Sytos Plus prompts for additional media.
d. FIXED LOGICAL DEVICE (FIXED DISK) SUPPORT
This release of Sytos Plus has the capability
to Backup to and Restore from logical devices
including: local drives, network drives, and
the IBM PS/2 3.5" Rewritable Optical Drive
This capability does not support floppy drives.
Before you can configure a drive in Sytos Plus
as a backup device, it must be accessible from
your operating system. (To verify that you can
change to the drive, type the assigned letter
followed by a colon, from the system prompt.)
Two additional device drivers, OPTICAL.SYS and
SCSI.SYS must already be installed to access a
Rewritable Optical Drive. If you have not
installed these device drivers, refer to the
"IBM Personal System/2 Rewritable Optical Drive
Setup Instructions" that came with your device.
To use a Rewritable Optical Drive as a
non-removable logical backup device, it must
have formatted media installed.
Several drives can be cascaded; that is, space
on several drives can be used for a single
Procedure. You must ensure that the total
amount of space allocated on the drives in
a cascaded configuration is sufficient for the
amount of data to be backed up. A Backup
Procedure will not be able to complete without
sufficient space.
NOTE: You must have read and write access
rights to any drive that you wish to
configure as a Sytos Plus logical device.
To add the Fixed Logical Device:
1. Select "Add new device" under "Utilities:
Backup Device Setup".
2. Select the Non-removable driver from the
list.
3. Select a drive from the "Setup Backup
Device" window.
4. Edit the selected drive to specify a
pathname, and allocate space.
5. If you want to add additional drives, select
and edit each drive as described in steps 3
and 4.
6. Select [OK]
e. SUPPORT FOR TAPE DRIVES IN THE MICROSOFT OS/2
1.3 LADDR ENVIRONMENT
This release of Sytos Plus supports Microsoft's
OS/2 1.3 Layered Device Driver Architecture
(LADDR) for SCSI adapters. Sytos Plus provides
device drivers for SCSI tape drives in the
LADDR environment. Refer to the flyer entitled
"Installing Sytos Plus Device Drivers in the
Microsoft OS/2 LADDR Environment", included in
your Sytos Plus package.
NOTE: Sytos Plus continues to support
versions of OS/2 that do not incorporate
LADDR, and continues to support non-SCSI
tape drives.
f. RESTORING DIRECTORY INFORMATION
A new option has been added to the existing
Restore Options. This option allows you to
Restore directory information (for example,
Directory Extended Attributes [EAs], and LAN
Manager/LAN Server Access Control Lists [ACLs])
along with file information.
To select this option, perform the following
steps at the "Restore: Options..." window:
1. Select other Restore options you want for
this Restore Procedure.
2. Select "Restore Directory Information".
3. When you have finished, choose [OK].
NOTE: If you do not select the Restore
Directory Information option, only your
file information will be restored.
g. USING TEXT FILES INSTEAD OF SELECTION SHEETS
From the command line you can now specify a
Selection Sheet File which temporarily
replaces the Selection Sheet for a Procedure.
Using a Selection Sheet File, you can specify
a list of files which you want to include in
the Procedure you are about to run. After the
Procedure runs, the original Selection Sheet
for the Procedure is restored, and the
Selection Sheet File can be used again.
To use the Selection Sheet File feature, you
must first create a Selection Sheet File and
then specify the file in the command line. To
create and use a Selection Sheet File, follow
Steps 1 and 2 below:
1. Create the Selection Sheet File by following
these steps:
a. Using any text editor, create the
Selection Sheet File (ASCII file) that
contains the entire pathnames of the
file(s) that you want to include in your
procedure. You can use wild cards (*
or ?) for filenames. Refer to the
User's Guide chapter, "Advanced Features:
Using Selection Sheets" for detailed
information.
b. After entering the pathname of the
file(s) you want selected, add any of
the following file options (in upper or
lower case) after the pathname:
S - Include subdirectories
C - Only Changed Files
E - Make this an Exclude Rule
c. Place comments at the end of any line
containing a pathname, or on a separate
line. The "greater than" character must
precede the comment.
NOTE: You may leave any amount of white
space between comments, or enter as many
comments as you like.
A sample Selection Sheet File follows:
D:\PROJECTS\PLANS\*
D:\TOPICS\NEW.* S E
C:\CURRENT\ALL.DOC s
d. Save the Selection Sheet File with a
unique name and extension (for example
SAMPLE.SEL). You can place it under the
directory where Sytos Plus was installed.
2. Enter the following at the command line:
SYPLUS "PROCEDURE NAME" /F(Filename)
NOTE: The Procedure name must be enclosed
in quotation marks. There is no space
between /F and Filename. You can use -F
instead of /F if you choose.
If the directory where you installed Sytos
Plus is included in your path, then the
Selection Sheet File must be located in the
directory from which you are running Sytos
Plus. If Sytos Plus is not included in your
path, then the Selection Sheet File must be
in the directory where you installed
Sytos Plus.
If neither of these is the case, you have
to specify the complete pathname of the
Selection Sheet File.
Sytos Plus will now run your Procedure using
the Selection Sheet File entered on the command
line. For additional information on running
Sytos Plus from the command line, refer to
"Command Line Operations" in the User's Guide.
NOTE: If you have problems running the
Procedure, re-enter the command line
ending with "/A" to generate an error
message. Review the error message and
its Help, and make the necessary
corrections.
h. INSTALLING ADDITIONAL DRIVERS
A new feature has been added to the "Utilities:
Backup Device Setup" window. This feature
makes it easier for you to add a device driver
from a Driver Diskette if Sytos Plus is already
installed.
To add a device driver using this new feature,
follow these steps:
1. Under the "Utilities: Backup Device Setup"
window, select "Driver Disk". The "Load
Device Drivers Diskette" window pops up.
2. Insert the diskette containing the device
drivers into your disk drive. In the "Load
Device Drivers Diskette" window, enter the
letter that represents your drive (A: is
the default). Select [OK].
3. The "Select Backup Device Drivers" window
pops up with a list of available drivers.
Select each driver that you wish to add and
select [OK].
4. Exit and restart Sytos Plus to update the
list of available drivers.
5. To add the device, refer to "Utilities:
Backup device setup" in the User's Guide
for detailed instructions on backup device
setup.
i. FULL OS/2 RESTORE
Sytos Plus now includes a default Procedure,
"Full OS/2 Restore". Full OS/2 Restore
automatically redirects OS/2 system files, as
outlined in the Getting Started booklet, in the
section "Restoring OS/2 User and System Files".
j. SYTOS PLUS RUNS IN BACKGROUND IN UNATTENDED
MODE
When you run Sytos Plus in unattended mode,
it runs in the background, appearing as an
icon on your screen. |
 winworldpc.com/download/76c39c06-32e2-82ac-c3bd-11c3a5c28f13/from/c39ac2af-c381-c2bf-1b25-11c3a4e284a2 winworldpc.com/download/76c39c06-32e2-82ac-c3bd-11c3a5c28f13/from/c39ac2af-c381-c2bf-1b25-11c3a4e284a2 |

This work is licensed under a Creative Commons Attribution 4.0 International License.
Contact us! (webform or ecsoft2 [dot] org![]() gmail [dot] com (email))
gmail [dot] com (email))


Add new comment