|
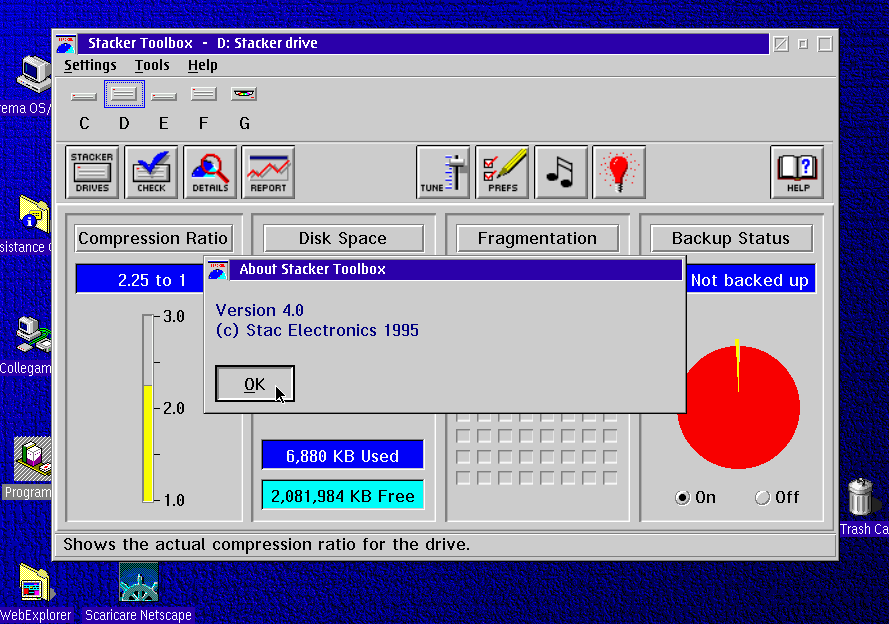
Stacker v. 4.0 (25/1/1995, Stac Electronics) |
Readme/What's new |
Stacker 4.0 for OS/2 & DOS
This document contains important information that may not be included in
the Stacker 4.0 for OS/2 & DOS User's Guide. It has two parts.
OS/2 Considerations
DOS Considerations
Any time you put new software on your system you should first back up
your existing data.
=====================================================================
OS/2 CONSIDERATIONS
-------------------------------
OS/2 2.11 required for speed-up
In order for Stacker to take advantage of OS/2's strategy 2 interface
and use the OS/2 cache, you must be running OS/2 2.11 (or 2.10 + the
Service Pack) or later. Versions of OS/2 2.10 and 2.0 + Service Pack
will not be cached on Stacker drives.
-------------------------------------------------
Special considerations for Warp's Archive feature
If you use Warp's Archive feature (under the Desktop's Settings), we
recommend that you do not compress your OS/2 boot drive.
-------------------------------
Creating a Stacker desktop icon
For your convinience we have provided a utility to create a Stacker
folder on your desktop. Just run STACICON.EXE from an OS/2 session.
----------------------------------
Need OS/2 2.1 and REXX for Toolbox
You need OS/2 2.1 or above for the Toolbox program to run correctly.
The Toolbox depends on REXX; if you didn't install the REXX component
with OS/2, see your OS/2 documentation.
-----------------------------------------
OS/2 cannot mount Stacker drives replaced
You cannot use x:\STACVOL.DSK,RP in the STACOS2.INI file. Any drives
with this switch will not be mounted, so their data won't be available.
------------------------
QEMM Exception error #13
If you receive this error message when running SETUP, remove Stealth
and start SETUP again. You can enable Stealth again after Stacker is
installed.
----------------------------
Installing over Novell DOS 7
Users installing Stacker for OS/2 & DOS over Novell DOS 7 with
Stacker 3.12 may get the warning message "Stacker is running but
your configuration file (STACKER.INI) doesn't show where the
Stacker files are stored". You may safely ignore this message.
===================================================================
DOS CONSIDERATIONS
The following information applies only when you have restarted your
computer into DOS and are running under DOS.
CONTENTS
Using 32-bit File Access with Windows for Workgroups 3.11
Compatibility and Other Issues
Third-party Disk Optimizers
Norton Disk Doctor 7.0
QEMM 7.5 and Conserving Memory
QEMM 7.x
QEMM and Configurations Without DPMS
Qualitas 386MAX and DPMS
PKZIP 2.04
Compaq Computers
GeoWorks
Fixing or Restoring a Stacker-aware DBLSPACE.BIN File
----------------------------------------------------------------
Using 32-bit File Access with Windows for Workgroups 3.11
Stacker now works seamlessly with Windows for Workgroups' 32-bit file
access (32BFA). Stacker requires no special options or configurations.
To get the best performance, you do, however, have to:
* Turn on 32BFA. (Refer to your WFW documentation if you don't know how.)
* Enable Lazy Writes in WFW.
To enable lazy writes in WFW
1. From the Program Manager's File menu, choose Run.
2. In the Command Line box, type SYSEDIT
3. Select the window that contains your SYSTEM.INI file
and in the [386Enh] section, type a line that says
ForceLazyOn=
followed by the drive letter(s) of your Stacker drive(s).
For example, if your Stacker drives are C:, D:, and E:,
you would insert the following line:
ForceLazyOn=CDE
4. Save the file and exit the editor.
Common 32BFA Workarounds
If you have trouble initializing 32BFA in Windows for Workgroups, here are
some common workarounds that might help:
* Make sure you are using a permanent swap file. 32BFA will not initialize
properly with temporary swap files.
* Be sure to close any open files or files (such as printer caches) that
are open by a line in your Autoexec.bat file.
* After turning on 32BFA, ensure these lines are in the [386Enh] section
of your SYSTEM.INI file:
device=vfat.386
device=ios.386
device=vxdldr.386
These lines mean a Real Mode Mapper (RMM) is loaded.
* Make sure the "minfilecache=" entry in the [vcache] section of the
SYSTEM.INI is appropriate for the amount of memory you have.
For example, a 2-MB cache would be appropriate for a system with
8 MB RAM.
* If the DOS SUBST command is run before Windows for Workgroups loads,
32-bit file access will not initialize.
* If you started the real mode network (NET START FULL or NET START
BASIC) and then start Windows for Workgroups, 32-bit file access will
not initialize.
For information about other system conditions that might interfere with
using 32BFA, check with Microsoft.
----------------------------------
COMPATIBILITY AND OTHER ISSUES
---------------------------
Third-party Disk Optimizers
Disk optimizers other than the Stacker Optimizer(TM) are not effective on
Stacker drives. Please do not use optimizers such as Norton Speed Disk 7
or 8 or PC TOOLS PRO 9.0 for DOS after you've set up Stacker on your system.
------------------------------
Norton Disk Doctor 7.0 and 8.0
Disk repair utilities, such as Symantec's Norton Disk Doctor (NDD),
are not aware of Stacker's new SmartPack(TM) technology. If you run
NDD against a Stacker 4.0 drive, you will receive an error message,
and NDD will recommend that you use the utilities provided with the
compression program.
However, you can run NDD against your Stacker drive if you skip
compression tests. You can turn off compression tests from the
command line or the NDD menu.
* From the command line:
Type: NDD /NOCOMP drive: <enter>
* From the NDD menu:
1. Start the NDD program as usual.
2. From the main menu select Options.
3. From the Options menu, select General.
4. Select Skip Compression Tests, then OK, and OK again to return
to the main menu.
In either case, once you have turned off Compression Tests, you can
run NDD against any drive, including Stacker drives. NDD will no longer
give you error messages.
* Windows users:
If you run NDD from Windows (Norton Utilities, version 8), or
have Norton Destop for Windows version 3, you can use the following
method to skip compression tests:
1. Open NDD.
2. From the menu bar, select Options.
3. From Options, select Preferences.
4. Click the box for Skip Compression Test.
5. Click OK to save the changes.
You can now run NDD without the error messages.
------------------------------
QEMM 7.5 and Conserving Memory
If you use DOS 6 or later and have QEMM 7.5 installed,
Stacker can run in as little as 13 KB. You'll have to
modify one of Stacker's configuration files after you
finish setting up Stacker.
1. If you are in Windows, exit it completely and
get to a DOS prompt.
2. Type ED /I and press ENTER.
3. Press ENTER to insert a new line.
4. Type /QD on the new line.
5. Press the ALT key, followed by F,
then press X to exit the editor.
6. When asked if you want to save the changes, press Y.
7. Restart your system to put the change into
effect.
---------
QEMM 7.x
If you are running a version earlier than QEMM 7.03, please consider
upgrading to the latest version. For QEMM 7.01 and 7.02, please add
the option /B=2001 to the DEVICE=DOSDATA.SYS line in your DOS
CONFIG.SYS file. In all versions of QEMM, at startup, the DOS-UP
feature (DOSDATA.SYS) temporarily disables your monitor and Stacker's
password prompt. In your CONFIG.SYS file, add the option:
DEVICE=DOSDATA.SYS /ALTVIDEO- so the password prompt is visible again.
------------------------------------
QEMM and Configurations Without DPMS
If your system doesn't use DPMS, the Stacker driver can use EMS (Expanded
Memory Specification) memory instead. This requires a /EMS switch in the
STACKER.INI file. When that switch is present and if you are using QEMM,
you should add the /DBF=2 switch to the QEMM386 command line in your
CONFIG.SYS file.
SETUP automatically puts the /EMS switch in the STACKER.INI file if:
* You run Express Setup and it creates a Stacker drive that uses 32 KB
clusters
OR
* You run Custom Setup and tell it to use EMS.
Run ED /I from a DOS prompt to edit or view your STACKER.INI file and ED /C to
edit your CONFIG.SYS file and add the /DBF=2 switch.
Note: Please don't use EMS if you are using QEMM's Stealth mode.
Stealth mode cannot access memory using EMS. During Custom Setup,
if you are given the option to use EMS or not, choose "Don't
Use EMS."
------------------------
Qualitas 386MAX and DPMS
DPMS requires a memory manager that enables VCPI (Virtual Control Program
Interface). When you run 386MAX and try to use DPMS, you get the following
error message:
"VCPI services are not available."
To have 386MAX provide VCPI, reply YES when asked if you would like
to enable EMS services during the 386MAX installation. If you already
have 386MAX installed, run INSTALL/R from the 386MAX directory
and reply YES to enabling EMS services.
----------
PKZIP 2.04
If your computer takes advantage of Stacker's DPMS (386 or higher with
1 MB of RAM), please use the -) option on the command line when using
PKZIP 2.04. This option disables PKZIP's use of DPMI services that interfere
with DPMS. If you want to permanently disable PKZIP's use of DPMI, add the
-) option to your PKZIP.CFG file.
----------------
Compaq Computers
If your Compaq computer uses PCMCIA cards, you need to make a few adjustments
when you install Stacker.
For example, if you use a docking station or other driver that changes drive
letters around, the PCMCIA card is assigned the next drive letter. Since you
can put the cards into different slots, just entering one drive letter into
the STACKER.INI will not necessarily automount the drive. Use the following
steps to ensure that you turn on Stacker AutoMount:
1. Add the following lines to the STACKER.INI file
and save the changes:
/RP=2
/AUTO
2. In the AUTOEXEC.BAT file, add the following lines:
STACKER x: (where x is the drive letter for the
first slot for the given setup)
STACKER y: (where y is the drive letter for the
second slot for the given setup)
Notes: PCMCIA Flash Cards are treated like network drives. Stacker will
not install on these devices.
If the PCMCIA driver offers the option to do a "compact format,"
do NOT do so. This option won't create a boot sector; therefore,
Stacker won't install. Format your ATA cards without the compact
option.
--------
GeoWorks
If you install Stacker when GeoWorks Ensemble is runnning, you may see a
message that states "Please insert disk STACVOL_DSK into drive x:. Press
ENTER to continue or (A)bort to exit."
If you see this message, press A to exit. Then use any text editor to
add the line "drive c=65535" under the [system] heading (the top section)
in the GEOS.INI file.
-----------------------------------------------------
FIXING OR RESTORING A STACKER-AWARE DBLSPACE.BIN FILE
If you can't get at your data and are using a version of DOS with
preloaded compression (MS-DOS 6.x, Novell DOS 7, or PC-DOS 6.1 or higher),
the Stacker-aware DBLSPACE.BIN file, which integrates data compression
with DOS, may be corrupt. Stacker provides a special program that you can
use to build a new Stacker-aware DBLSPACE.BIN file on your system.
To fix or restore a Stacker-aware DBLSPACE.BIN file:
1. At the DOS prompt, change to the Stacker directory.
This is usually C:\STACKER. If you loaded Stacker
into a different directory, change to that directory.
2. At the DOS prompt, type
REDBL drive:
where drive is the uncompressed drive letter of the
boot drive. If no Stacker drive is mounted, use drive C.
The REDBL program analyzes your computer and builds or
replaces the DBLSPACE.BIN file.
3. Remove any floppy disks, and restart your computer.
========================================
(C) 1995 Stac Electronics. All rights reserved.
One or more U.S. patents: 4701745, 5016009, 5126739, and 5146221.
Other patents pending.
All Stac product names are trademarks or registered trademarks
of Stac Electronics. Other product names are trademarks of their
respective holders.
Portions (C) Novell 1994.
======================================== |
|
Stacker v. 1.0 (11/2/1994, Stac Electronics) |
Readme/What's new |
Stacker for OS/2 & DOS - Late Breaking News
This document contains important information that is not included in
the Stacker for OS/2 & DOS User's Guide, the User's Guide Addendum,
or in the Help.
If you're using any special or unique hardware or software with your system,
see the Help provided in SETUP. To get help in these situations:
1. From any SETUP screen, press F1.
2. Press ENTER to choose the Index.
3. Press TAB to select Hardware Considerations or Software Considerations
and press ENTER.
Contents
This document contains late-breaking information on the following topics:
1.0 Changes to Stacker for OS/2 & DOS User's Guide
1.1 Which CONFIG.SYS files are updated by UNSTACK
1.2 Rebooting directly from POSTINST and POSTUP
1.3 Instructions for keeping SWAPPER.DAT uncompressed
2.0 Non-compression of SWAPPER.DAT
3.0 Error messages after UNSTACK on Dual Boot systems
4.0 If you're using a Dual Boot system with Stacker 2.0 or 3.0
5.0 Making space for UNSTACK
6.0 Formatting a Stacker drive as HPFS: don't try this!
7.0 Lost extended attribute message on CONFIG.SYS
8.0 Files not found at OS/2 startup
9.0 OS/2 autocheck on Stacker drives
10.0 HPFS boot drives
11.0 Changing where Stacker for OS/2 & DOS is installed
12.0 Avoiding the SUBST command
13.0 SDEFRAG lowers fragmentation even if you don't tell it to defragment
14.0 Creating large Stacker drives
14.1 Two Stacker drives created when one is requested
14.2 Setup running out of memory
15.0 Using CONFIG with Optical Disk Drives (OS/2 2.0 only)
16.0 For users of systems with OS/2 pre-installed
17.0 Running DOS from a disk or disk image within OS/2
18.0 GammaTech utilities
19.0 Customizing Stacker for international use
20.0 Determining free space requirements
----------------------------------------------------------------------------
1.0 Changes to Stacker for OS/2 & DOS User's Guide
1.1 Which CONFIG.SYS files are updated by UNSTACK
The User's Guide states (on page 93) that UNSTACK updates only one OS/2
CONFIG.SYS file. Actually, when UNSTACK removes a Stacker drive it updates
all the OS/2 and DOS CONFIG.SYS files it can find. It can't, however, update
a CONFIG.SYS file that's on an HPFS partition or on a hidden partition.
1.2 Rebooting directly from POSTINST and POSTUP
The POSTINST and POSTUP utilities both have been modified to prompt you to
press Ctrl-Alt-Del to reboot when they have completed their processing.
Accordingly, step 18 on page 156 and step 9 on page 160 of the User's Guide
can be omitted.
1.3 Instructions for keeping SWAPPER.DAT uncompressed
The directions in Appendix E of the User's Guide for telling OS/2 to use an
uncompressed drive for SWAPPER.DAT no longer apply, since this is now done
automatically, as described in the next section.
2.0 Non-compression of SWAPPER.DAT
The OS/2 swap file SWAPPER.DAT cannot be kept on a Stacker drive in this
version of Stacker for OS/2 & DOS. If SWAPPER.DAT is on a Stacker drive,
SYNC2.EXE will detect this when it runs at startup and will alter the
SWAPPATH directive in the OS/2 CONFIG.SYS to make sure that on subsequent
reboots SWAPPER.DAT will be on an uncompressed drive.
When SYNC2 has to move SWAPPER.DAT, it always tries to move it to the
uncompressed drive corresponding to the OS/2 boot drive. If there is not
enough uncompressed space on that drive, SYNC2 suggests making more free
space available by running SDEFRAG /GP. If you have more free space on a
different uncompressed drive, you may wish to edit CONFIG.SYS so that the
SWAPPATH directive instead points to the uncompressed drive with more free
space.
As mentioned above in section 1.3 of this file, the directions in Appendix
E of the User's Guide for telling OS/2 to use an uncompressed drive for
SWAPPER.DAT no longer apply, since this is done automatically.
3.0 Error messages after UNSTACK on Dual Boot systems
On a Dual Boot system, UNSTACK may not update the OS/2 CONFIG.SYS file;
when you reboot OS/2 you will get a message that the drive you removed
cannot be mounted. Running CONFIG under OS/2 updates the CONFIG.SYS file.
4.0 If you're using a Dual Boot system with Stacker 2.0 or 3.0
A number of users of Stacker 2.0 or Stacker 3.0 for Windows and DOS who
couldn't wait for Stacker for OS/2 & DOS have set up Dual Boot systems on
which the C drive is a Stacker drive. They've done this by installing OS/2 in
the C drive's uncompressed space. On such a system, rebooting from DOS to
OS/2 would normally be a problem because the physical C drive is swapped with
a different drive, which throws off IBM's BOOT.COM. However, these ingenious
folks have solved this problem by rerunning SSWAP.COM before BOOT /OS2 (for
example, if C: is swapped with E:, they would enter SSWAP C: E:). That way,
C: is what the IBM BOOT.COM expects it to be, namely the physical C drive.
If you're not one of these users, you can ignore the rest of this section.
If you are one of these users, your preferred course of action is to run
UNSTACK on your existing C drive, then install Stacker for OS/2 & DOS and
turn the whole drive, including OS/2, into a new Stacker drive. That way,
you'll be able to see all your data under both OS/2 and DOS. If you're
currently using Stacker 2.0, in which case you don't have UNSTACK, you can
use the Stacker for OS/2 & DOS UNSTACK as follows:
1. Boot with the Stacker for OS/2 & DOS Disk 1 in the A drive
2. Update A:\CONFIG.SYS by running CONFIG.
3. Reboot with Disk 1 still in the A drive.
4. Run UNSTACK to remove Stacker drive C.
After you've run UNSTACK, you can run the Stacker for OS/2 & DOS SETUP.
If for some reason you don't run UNSTACK before the Stacker for OS/2 & DOS
SETUP, you need to be aware of two issues:
1. If you run SETUP with the Stacker drive C mounted and swapped (the way
you normally run your system), SETUP will not modify the OS/2 CONFIG.SYS and
AUTOEXEC.BAT files, which are stashed away as C:\OS2\SYSTEM\CONFIG.OS2 and
C:\OS2\SYSTEM\AUTOEXEC.OS2 when you're running DOS. The next time you reboot
to OS/2, you'll need to do two things:
(i) Run CONFIG to update your OS/2 CONFIG.SYS
(ii) Edit the OS/2 AUTOEXEC.BAT to put the Stacker for OS/2 & DOS path (which
is C:\STACKER\OS2 if you accepted the default) in the PATH command.
2. If you run SETUP without the Stacker drive C mounted, it will not install
Stacker for OS/2 & DOS on the C drive. However, if you have another drive
that isn't compressed, you can install Stacker for OS/2 & DOS there. In that
case, SETUP will update your OS/2 CONFIG.SYS and AUTOEXEC.BAT files, unlike
the preceding case.
5.0 Making space for UNSTACK
UNSTACK may tell you that you must make more space on the uncompressed drive.
If you're unstacking an OS/2 boot drive, the easiest way to make lots of
space may be to delete the SWAPPER.DAT file, which normally will be in the
\OS2\SYSTEM directory on the uncompressed drive. (If you're not sure which
drive is the uncompressed one, run SWAPMAP. For example, if you're about to
unstack drive D, look for the drive that SWAPMAP says was drive D at boot
time.)
If you decide to make more space by deleting other files, it's best to boot
OS/2 and delete the files, so that the extended attributes of files you
delete aren't left dangling. Then run CHECK (in a DOS session) and the OS/2
CHKDSK to make sure the Stacker drive is clean, and reboot into DOS. If CHECK
reported any errors, run CHECK /F, and finally run UNSTACK again.
6.0 Formatting a Stacker drive as HPFS: don't try this!
If you try to reformat a Stacker drive as an HPFS drive, the format operation
may "succeed" but the Stacker drive will be rendered useless. Of course, all
the data on the drive will be lost, as in any formatting operation.
7.0 Lost extended attribute message on CONFIG.SYS
The OS/2 CHKDSK may give you a "lost extended attribute" message after you
run SETUP, UNSTACK, or REMOVDRV if your OS/2 CONFIG.SYS had an extended
attribute. Those programs do not preserve the extended attribute of
CONFIG.SYS. By default, CONFIG.SYS has no extended attribute; when it
does have one, it's generally just a file type whose loss does no harm.
Just run CHKDSK /F to fix the problem.
8.0 Files not found at OS/2 startup
Installation of some OS/2 software packages may insert DEVICE= lines at the
top of the OS/2 CONFIG.SYS file, before the STACKER.SYS and SSWAP2.SYS lines.
The next time you reboot OS/2, these new drivers may display error messages
saying they can't find certain files; the reason is that those files are on a
Stacker drive which, because the Stacker driver hasn't been loaded yet, can't
be accessed yet.
The solution is to edit the OS/2 CONFIG.SYS and move the Stacker-related
lines (the ones that mention STACKER.SYS, SSWAP2.SYS, FATMGR.EXE, and
SYNC2.EXE) to the top of CONFIG.SYS, making sure to keep them in their
original order.
9.0 OS/2 autocheck on Stacker drives
If a drive is found in an inconsistant state during startup (caused by
such events as a system crash or power failure), OS/2 can run a FAT
autocheck on startup; the /AC switch on the DISKCACHE line in CONFIG.SYS
causes it to happen. It doesn't run on Stacker drives, however. If you see
the Stacker message "Updating allocation map..." during startup, run Chkdsk
on your Stacker drive. If any problems are reported, boot from floppy and
repair it as usual.
10.0 HPFS boot drives
If you have an OS/2 boot drive formatted as an HPFS drive, the CONFIG.SYS and
AUTOEXEC.BAT files on that drive will not be updated by SETUP, UNSTACK, and
REMOVDRV, since these programs run under DOS and therefore cannot access HPFS
drives. To bring this drive up to date, boot from it and run CONFIG to update
the CONFIG.SYS file. You may also wish to use a text editor to insert the
path where you've installed Stacker for OS/2 & DOS in the AUTOEXEC.BAT file's
PATH statement, so that the Stacker utilities will be directly available. For
example, if you've installed Stacker for OS/2 & DOS in C:\STACKER\OS2, you
would change the PATH statement from
PATH D:\OS2;D:\OS2\MDOS
to
PATH D:\OS2;D:\OS2\MDOS;c:\stacker\os2
11.0 Changing where Stacker for OS/2 & DOS is installed
After you've installed Stacker for OS/2 & DOS, it's inadvisable to try to
move it to a different directory or to give the directory that it's in a new
name (for example, to install in \STACKER\OS2 and then by renaming
directories change it to \ST\O2). If you absolutely must change the path
of the Stacker files, you need to replace the old Stacker path with the new
one every time it occurs in the following files:
(i) All OS/2 and DOS CONFIG.SYS files containing Stacker commands. This
includes the CONFIG.SYS on the second diskette in the set of Stacker-
aware OS/2 boot diskettes you made with STACBOOT. It also includes
C:\OS2\SYSTEM\CONFIG.DOS on a Dual Boot system where you're currently
running OS/2.
(ii) All OS/2 and DOS AUTOEXEC.BAT files. This includes
C:\OS2\SYSTEM\AUTOEXEC.DOS on a Dual Boot system where you're currently
running OS/2.
(iii) \OS2\SYSTEM\CONFIG.OS2 and \OS2\SYSTEM\AUTOEXEC.OS2 on a Dual Boot
system where you're currently running DOS.
(iv) INSTPATH.TXT on Stacker for OS/2 & DOS Disk 1 and Disk 2 and in the
directory to which you've moved Stacker.
If you have HPFS drives on your system, the path may be different under DOS
than it is under OS/2 because DOS skips over HPFS drives. The DOS CONFIG.SYS
and AUTOEXEC.BAT files (including CONFIG.DOS and AUTOEXEC.DOS) should use
the DOS drive letter. The OS/2 CONFIG.SYS and AUTOEXEC.BAT files (including
CONFIG.OS2 and AUTOEXEC.OS2), plus all the INSTPATH.TXT files, should use the
OS/2 drive letter.
12.0 Avoiding the SUBST command
Avoid using SUBST to assign a new drive letter to a directory on a Stacker
drive. If you must do this, it is advisable to remove the mounted drive
before running any Stacker utilities, such as CHECK. If x: is the drive
letter of the mounted drive, SUBST x: /D will remove it.
13.0 SDEFRAG lowers fragmentation even if you don't tell it to defragment
SDEFRAG performs certain kinds of cleanup even if you decline to actually
defragment the drive, so it and the other utilities that report on the
fragmentation level (CHECK and REPORT) may display a lower number than
before.
14.0 Creating large Stacker drives
This section covers some situations you may run into when creating Stacker
drives larger than 512 megabytes.
14.1 Two Stacker drives created when one is requested
When you compress a large drive, you may find that you end up with two
Stacker drives instead of just one. The reason is that we avoid using 16K
clusters (the units in which space is allocated to files) if we can use 8K
ones, and avoid using 32K ones if we can use 16K. Smaller clusters can allow
more data to be stored on a drive, but they limit the size of the drive; 8K
clusters allow up to a 512 megabyte drive, and 16K clusters allow up to a 1
gigabyte drive. When you compress an entire drive, the existing data on the
drive always goes onto a single drive, regardless of the cluster size that
requires.
You can enforce a given cluster size when creating a new Stacker drive by
going into SETUP's Advanced Options (during a Custom Setup) and selecting
that cluster size.
14.2 SETUP running out of memory
If you attempt to create a Stacker drive with 16K or 32K clusters by
compressing a drive that has 32K clusters and has extended attributes on
it, you will probably get an "insufficient memory" error message and the
Stacker drive will not be created. The workaround is to remove enough data
from the drive you wish to compress so that it has less than 1,024,000,000
bytes of data on it, and rerun SETUP to compress the drive. SETUP will now
create two Stacker drives with 16K clusters, as described above in section
14.1.
15.0 Using CONFIG with Optical Disk Drives (OS/2 2.0 only)
If you run CONFIG in a DOS session under OS/2 2.0 with an optical drive
mounted that has no disk in it, OS/2 will display a SYS0039 error, saying
the drive is not ready. If this happens, select "Return error code to
application" and CONFIG will continue normally.
16.0 For users of systems with OS/2 pre-installed
If your system was preloaded with OS/2, then it probably didn't come with
OS/2 installation diskettes. In that case, you need to make your own OS/2
utility diskettes and use copies of those diskettes whenever the Stacker for
OS/2 & DOS User's Guide asks you to use copies of the OS/2 installation
diskettes. With at least some systems, the procedure for making the utility
diskettes is documented in a manual called "Using the Welcome Folder," in a
section called "Creating Utility Diskettes."
The procedure for creating utility diskettes results in three diskettes,
which are supposed to be labeled Utility Diskette 1, 2, and 3. Use Utility
Diskette 1 whenever the Stacker for OS/2 & DOS User's Guide tells you to use
the OS/2 Installation Diskette, and use Utility Diskette 2 whenever the
User's Guide tells you to use OS/2 Diskette 1.
You'll need copies of the first two Utility Diskettes in order to run
STACBOOT, which will turn them into "Stacker-aware" OS/2 boot diskettes that
can be used to repair errors on drives that might otherwise be locked if you
booted in the usual way.
17.0 Running DOS from a disk or disk image within OS/2
The information in this section applies to running a specific version of DOS
from within OS/2. For example, you can start up an MS-DOS 4.0 session by
inserting an MS-DOS 4.0 boot diskette in the A drive and double-clicking on
the "DOS from Drive A:" icon in the Command Prompts folder. In general, you
can start up such a DOS session from a diskette, from a hard drive (normally
C:), or from a disk image created by VMDISK.
This section does not apply to regular DOS Window or DOS Full-screen sessions
within OS/2, nor does it apply to rebooting from OS/2 to DOS on a Dual Boot
system via the BOOT /DOS command or the Dual Boot icon.
When running a specific version of DOS within OS/2, you can access all the
Stacker drives in that session that you can normally access in OS/2, provided
the CONFIG.SYS used by that session contains a DEVICE=FSFILTER.SYS line.
OS/2's on-line help contains further information on FSFILTER.SYS.
The results are unpredictable if you run DOS in this manner from a disk or
disk image that itself mounts Stacker drives or runs Stacker utilities. You
should make sure the disk's CONFIG.SYS doesn't load STACKER.COM or SSWAP.COM
and that its AUTOEXEC.BAT doesn't run CHECK, before booting DOS from it
within OS/2.
18.0 GammaTech utilities
The current version of Stacker for OS/2 & DOS is fully compatible with the
maintenance release of the GammaTech Utilities (1.02). With earlier versions,
a trap 000E with possible data corruption may occur if you try to run the
GammaTech Analyze, Sector-Edit, or Sentry utilities on a Stacker drive. The
utilities themselves may be stored a Stacker drive, but you should not tell
them to operate on a Stacker drive.
19.0 Customizing Stacker for international use
By default, Stacker uses a standard United States keyboard and conventions
for date, time, and characters. You can tell Stacker that you use a different
keyboard layout and request country-specific conventions for date, time, and
characters if necessary. The \INTL directory on Stacker for OS/2 & DOS Disk 1
includes new files for use in these countries:
Code Country
DE Deutsch (German)
ES Espa±ol (Spanish)
FR Franþais (French)
IT Italiano (Italian)
JA Japanese
NL Nederlands (Dutch)
PO PortuguÛs (Portuguese)
SV Svenska (Swedish)
UK United Kingdom
US US/Canada (To revert to the standard version after changing it)
BEFORE RUNNING SETUP FOR THE FIRST TIME:
Modify Stacker for OS/2 & DOS to suit your computer following these steps:
1. Start your computer as usual.
2. Get to a DOS command line; a DOS session within OS/2 is fine.
3. Insert Stacker for OS/2 & DOS Disk 1 into drive A.
4. Type A:\INTL\LANGUAGE code where code is one of the choices in the table
above (for example, A:\INTL\LANGUAGE DE for Deutsch) and press ENTER.
5. Restart your computer using this disk to run SETUP.
Whenever your computer restarts into DOS from this disk, it will use the
appropriate keyboard and country settings.
The LANGUAGE batch file runs the KEYB and COUNTRY commands to make your
computer respond appropriately. KEYB specifies the keyboard layout in use,
while COUNTRY determines the appropriate date, time, currency, character
sort, and filename validity for the computer.
Using any keyboard other than the standard United States English layout uses
a bit more memory. If you find that you run out of memory after customizing
it for your language, use A:\INTL\LANGUAGE US to restore it to the default
settings. You'll be able to use it, but the keyboard and displayed values
will be in their default state.
20.0 Determining free space requirements
Currently Setup allows you to compress an entire drive as long as you have at
least 1% plus 45K free, or compress free space if you have at least 100K
free. However, if you are trying to compress a drive that has particularly
large clusters, you may receive an error message indicating that Setup cannot
continue because the disk is full. If this happens to you, you can use the
following procedure to determine the free space requirements.
1. Determine the Number of Sub-Directories using the CHKDSK command.
This is the "Number of Directories" (not the bytes).
Write that number here._________________________________
2. Determine Stacker's Working Drive Size using the CHKDSK command.
This is the "Bytes Total Disk Space."
Write the number of bytes here._________________________
3. Determine the amount of data you have on your disk using the CHKDSK
command. This is:
Bytes determined in #2 _____________________________
- "Bytes Available on Disk"_____________________________
= _____________________________
4. Determine the STACVOL cluster size on your drive in bytes using the
following table. Locate your drive size (the number of bytes determined
in #2) in the first column. Locate your data size (the number of bytes
determined in #3) underneath the Data Size heading. The cluster size for
your drive is displayed in the column beneath the range in which your
data size falls.
Write the number of bytes here.________________________
Drive Size | Data Size
|0 - 1,023,999,999 |1,024,000,000 - 2,147,483,648
| STACVOL Cluster Size
----------------------------------------------------------------------------
0 - 460,799,999| 8,192 | N/A
460,800,000 - 921,599,999| 16,384 | N/A
921,600,000 - 2,147,483,648| 16,384 | 32,768
----------------------------------------------------------------------------
5. Multiply the number from #1 by the number of bytes from #4.
Write that value here.________________________
6. Multiply .006 by the number of bytes from #2.
Write that value here.________________________
7. Add the two values calculated in #5 and #6. This is the free space
requirement for compressing the drive.
Write that value here.________________________
8. Remove data from your drive until the amount of free space you have on
your disk (see #3) is at least this size. |


Add new comment