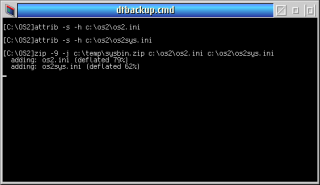
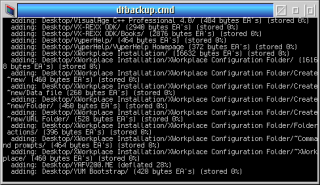
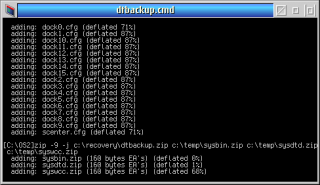
This simple REXX script will create a recovery directory on the boot drive. Into this it will place ZIPped copies of the above files constituting the desktop. It will also include utilities which are useful when restoring the desktop (e.g. UNZIP).
DTBACKUP (Simple desktop backup)
Release date:
Monday, 31 December, 2001
License:
- Open source (generic)
Interface:
- PMShell
- Workplace Shell
- VIO
Manual installation
Program is distributed as ZIP package: download to temporary directory and unpack to destination folder. See below for download link(s).
Following ones are the download links for manual installation:
| DTBACKUP (Simple desktop backup) (31/12/2001, Robert D Eager) | Readme/What's new |
Simple backup of the OS/2 desktop
=================================
Overview
--------
The OS/2 desktop can, at times, be a little fragile. It is therefore
worth backing it up regularly. The desktop is essentially described by
the following:
o The desktop directory (assumed here to be \DESKTOP on the boot drive).
o The files \OS2\OS2.INI and \OS2\OS2SYS.INI on the boot drive.
Note that these files also contain a lot of other information,
but there is a great deal of interdependence between many items here.
o The files \OS2\DLL\SCENTER.CFG, and \OS2\DLL\DOCK*.CFG on the boot drive.
These contain the WarpCenter configuration.
There is a standard desktop archiving mechanism in OS/2, accessed via
the desktop Properties notebook, but it saves only the last three
versions. Sometimes, by the time a problem has been identified, enough
reboots have taken place to overwrite all of the 'good' copies.
Incidentally, the WarpCenter configuration is not saved by default when
the desktop is archived using the above mechanism. To include it, add
suitable lines (specifying the .CFG files) to the file
\OS2\ARCHIVES\OS2.KEY on the boot drive; the format will be obvious from
the existing entries.
A REXX script for desktop backup
--------------------------------
This simple REXX script will create a recovery directory on the boot
drive. Into this it will place ZIPped copies of the above files
constituting the desktop. It will also include utilities which are
useful when restoring the desktop (e.g. UNZIP).
Put the utility RM.EXE in any suitable directory; it's best to use the place
where you keep other utility programs. Alter the 'binp' variable at
the start of the script to describe this directory.
If your desktop isn't in \DESKTOP any more, alter the 'desktop' variable too.
Change the name of the recovery directory if you really want to; the variable
'recovery' specifies it.
Around line 30 is a list of files to be placed in the recovery
directory. Change this and add to it if you want. remember to put the
total number of files into 'rfiles.0'.
Run the script to check it out. You should end up with a recovery
directory containing some ZIP files and the utilities you specified.
Arrange to run this at suitable intervals.
The intention is that the script will be run before each normal disk
backup, to record the current state of the desktop. I personally do
this before each nightly backup, so that the nightly backup includes the
latest copy of the recovery directory. In addition, this means that the
most recent version of the recovery data is readily available, as
corruption is less likely to occur in the middle of the night when the
backup is run.
Restoration of the backup is a manual process; this is safer than an
automated method that might go wrong. The steps are:
1. Boot to a basic command prompt using install diskettes, utility diskettes
or a maintenance partition.
2. Delete the entire desktop directory tree. I use the command:
rm -rf \Desktop
for this; the 'rm' utility is included with the backup script.
3. Unzip the backed up directory tree from the recovery directory.
Familiarity with UNZIP is assumed.
4. Delete the files OS2.INI and OS2SYS.INI in \OS2\DLL;
they may have to be un-hidden using the ATTRIB command.
5. Unzip the backed up versions of the above files from the recovery
directory.
6. Delete the files SCENTER.CFG and DOCK*.CFG from \OS2\DLL.
7. Unzip the backed up versions of the above files from the recovery
directory.
After this, reboot normally.
More about RM.EXE
-----------------
This is based on the UNIX utility of the same name. Type:
rm -h
for help.
Disclaimer
----------
This works for me, and has saved me on a number of occasions. It should
work for you, but I give no guarantees.
Bob Eager
December 2001 |
 www.tavi.co.uk/os2pages/utils/dtbackup.zip www.tavi.co.uk/os2pages/utils/dtbackup.zip |
 local copy local copy
|
Record updated last time on: 22/06/2018 - 15:20

This work is licensed under a Creative Commons Attribution 4.0 International License.


Add new comment