|
Ami Pro for OS/2 v. 3.0 (11/11/1993, Lotus Development Corporation) |
Readme/What's new |
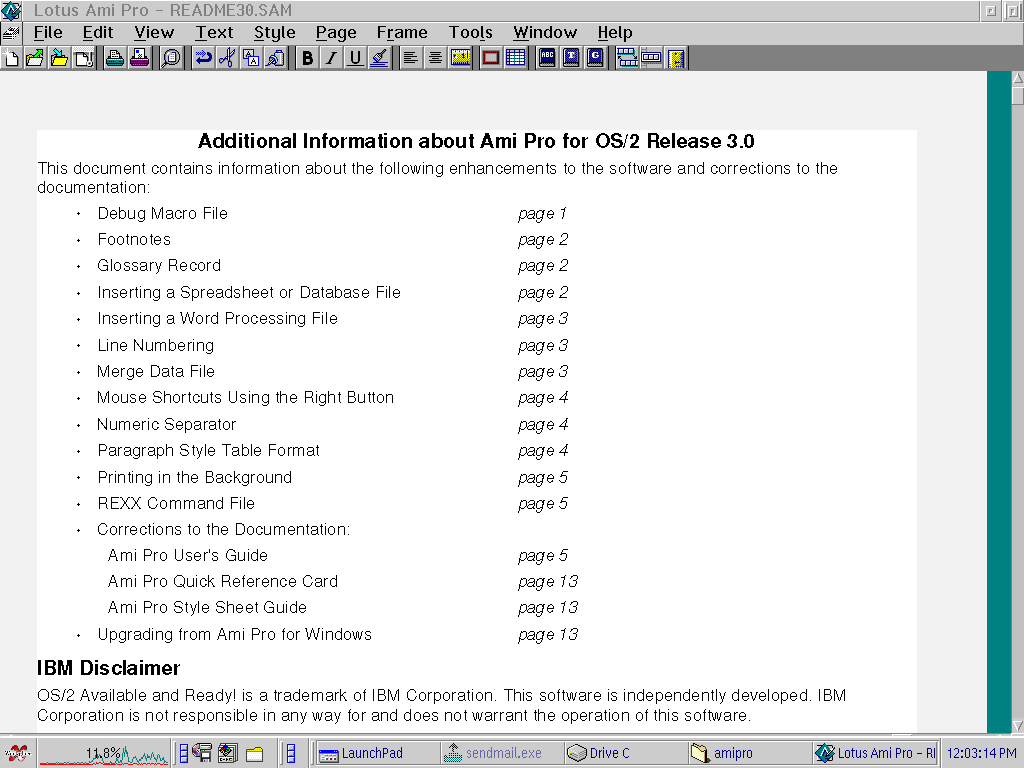
Additional Information about Ami Pro for OS/2 Release 3.0
This document contains information about the following enhancements to the software and corrections to the documentation:
v Debug Macro File page 1
v Footnotes page 2
v Glossary Record page 2
v Inserting a Spreadsheet or Database File page 2
v Inserting a Word Processing File page 3
v Line Numbering page 3
v Merge Data File page 3
v Mouse Shortcuts Using the Right Button page 4
v Numeric Separator page 4
v Paragraph Style Table Format page 4
v Printing in the Background page 5
v REXX Command File page 5
v Corrections to the Documentation:
Ami Pro User's Guide page 5
Ami Pro Quick Reference Card page 13
Ami Pro Style Sheet Guide page 13
v Upgrading from Ami Pro for Windows page 13
IBM Disclaimer
OS/2 Available and Ready! is a trademark of IBM Corporation. This software is independently developed. IBM Corporation is not responsible in any way for and does not warrant the operation of this software.
Debug Macro File
You can use Debug to identify run-time errors in a macro. These errors occur when you play the macro, even though the macro saved properly.
You can also display variables and modify their values.
To debug a macro file
1. Choose Tools Macros.
2. Choose Edit.
3. Select the macro file you want to debug and choose OK.
Ami Pro displays the macro file.
4. Choose Tools Macros.
5. Choose Debug.
The Debug dialog box displays and remains on the screen so you can continue to check the macro.
To play the macro
Choose Run/Continue.
If a run-time error is encountered, Ami Pro displays an error message and pauses the macro.
Choose the desired command button to resume checking the macro.
To check each step in the macro
Choose Single Step to play the macro and pause at every step.
Choose Step Through to play the macro but not pause at any steps that are part of another function.
Choose the desired command button to resume checking the macro.
To stop playing the macro
Choose Abort or Interrupt.
These buttons replace the Select Macro button while Ami Pro plays the macro.
The macro file remains in the window so you can continue debugging it.
To debug another macro
Make the desired macro file the active window and choose Select Macro.
Ami Pro changes the macro file name in the Debug dialog box.
You can now specify whether you want to play the macro or check each step in the macro.
To display variables and modify their values
If the Debug dialog box is open, you can display a list of macro variables and their values. You can modify the values and then continue the macro with the new values.
1. Choose Variables in the Debug dialog box.
The Variables dialog box displays and remains on the screen so you can continue to display variables and modify their values.
2. Select the desired variable.
3. Type the New Value you want to use.
4. Choose Update if you want to assign a new value to the variable.
5. Choose the desired command button in the Debug dialog box to play the macro.
6. Choose Close to close the Variables dialog box when you no longer need to display the variables.
Footnotes
Files with footnotes in tables will preserve the footnote text inside the table, but the footnote references will be lost.
Glossary Record
You can modify a glossary record by opening the glossary data file and editing the text.
You can also modify the ID name for a glossary record.
To modify a glossary record
1. Choose File Open.
2. Specify the name of the glossary data file and choose OK.
3. Insert, delete, or edit the text or ID name for a glossary record.
4. Choose File Save to save the changes.
Inserting a Spreadsheet or Database File
If you insert a spreadsheet or database file with the insertion point in main document text, Ami Pro imports the data as a table, starting at the location of the insertion point. The table contains the correct number of columns and rows for the portion of the file you are importing.
If you insert a spreadsheet or database file with the insertion point in a table, Ami Pro creates a table in the current cell, which may make the data difficult to read.
If you insert a spreadsheet or database file with the insertion point in a frame, Ami Pro creates a table with the correct number of columns and rows and places the data into the appropriate cells.
If you insert data into an empty selected frame, Ami Pro creates a table in the frame. The table fits in the frame and contains correct number of columns and rows for the portion of the file you are importing.
If you place the insertion point inside a frame that contains text, Ami Pro imports the data as a table, starting at the location of the insertion point.
The frame must be large enough to accommodate the data you are importing.
Inserting a Word Processing File
If you insert a word processing file with the insertion point in main document text, Ami Pro imports the data starting at the location of the insertion point.
If you insert a word processing file with the insertion point in a frame, Ami Pro imports the data into the frame starting at the location of the insertion point.
If you insert a word processing file with the insertion point in a table, Ami Pro inserts the information into the current cell. If the pages do not flow as you anticipate (for example, if you have one line on a page), you can do the following to correct the page flow:
v Deselect Keep With Previous paragraph in the Modify Style dialog box under Breaks.
v Select Allow page/column break within in the Modify Style dialog box under Breaks.
v Deselect Widow/Orphan control in the User Setup dialog box under Options.
v Increase the column width in the Column/Row Size dialog box.
Line Numbering
You can number all lines of the pages in a document including blank lines, or number only those lines that contain text. The line numbers appear in the left margin of every page in the document. This makes it easy to find and refer to information in translated or legal documents.
To guarantee that the line numbers align properly with the text in a document, you should specify the same font and line spacing for all the paragraph styles used in the main document text. In addition, you should set the paragraph spacing above and below options to zero for all paragraph styles used in the main document text.
To number lines
1. Choose Page Line Numbering.
2. Select Number all lines or Number text lines as the desired type of numbering.
3. Select the desired Options.
4. Select the paragraph style on which you want the line numbering based.
You should base the line numbering on the paragraph style you use for the majority of the main document text. If you select Number all lines, Ami Pro uses the font specified for the paragraph style you select. If you select Number text lines, Ami Pro numbers uses the font specified for Body Text.
Every line
Numbers every line in the document.
Every other line
Numbers one line, then skips the next line.
Every fifth line
Numbers every fifth line starting with line 5.
Every nth lines
Numbers every line that is a multiple of the number you specify.
Reset each page
Counts the first line on each page as line number 1.
5. Choose OK.
Merge Data File
To use File Merge to create a merge data file
You can use File Merge if you want to specify your own merge field names and delimiters.
1. Choose File Merge.
Ami Pro displays the Welcome to Merge dialog box.
2. Select Option 1 and choose OK.
Ami Pro displays the Select Merge Data File dialog box.
3. Choose New.
Ami Pro displays the Name Merge Data File dialog box.
4. Specify the desired name for the merge data file and choose OK.
Ami Pro opens the document and displays the Create Data File dialog box.
5. Specify the merge field names.
6. Choose OK when you finish specifying all the merge field names and their order.
Ami Pro displays the Data File dialog box so you can create the merge data.
To assign a merge data file if you just closed that data file
If you just created or modified a data file, Ami Pro automatically displays the Welcome to Merge dialog box.
1. Select Option 2 and choose OK.
Ami Pro displays a message. Choose No.
Ami Pro displays the Open dialog box.
2. Choose New.
3. Select the style sheet you want to use for the merge document.
4. Choose OK.
To merge Ami Pro for Windows with Ami Pro for OS/2 merge data files
Ami Pro for Windows Release 3.0 cannot merge with Ami Pro for OS/2 merge data files that contain empty fields. However, Ami Pro for Windows will merge with OS/2 merge data files that do not contain empty fields.
Mouse Shortcuts Using the Right Button
You can use the right mouse button to display the Modify Style and Modify Page Layout dialog boxes.
To display the Modify Style dialog box
Click the right mouse button when the mouse pointer is over text to move the insertion point and display the Modify Style dialog box.
To display the Modify Page Layout dialog box
Click the right mouse button when the mouse pointer is in the right or left margin area to display the Modify Page Layout dialog box.
Numeric Separator
You can modify the numeric separator by modifying the decimal symbol specified in the paragraph style.
To modify the numeric separator
1. Choose Style Modify Style.
Mouse Click the right mouse button when the mouse pointer is over text to move the insertion point and display the Modify Style dialog box.
2. Choose Table.
3. Select a paragraph style you use for text that contains numeric tabs.
4. Specify the desired Decimal symbol.
5. Choose OK.
Ami Pro uses the Decimal symbol as the numeric separator whenever you create a numeric tab in text using that paragraph style.
Paragraph Style Table Format
To modify paragraph style table format
When you create a table, Ami Pro creates a Table Text paragraph style and assigns that paragraph style to all table cells. If you type numbers in tables, you can specify how the numbers appear by modifying the table format for the Table Text paragraph style.
If you assign other paragraph styles to numbers in tables, you can specify the table format for those paragraph styles also.
Ami Pro also uses the table format whenever you create a numeric tab. You can specify the numeric separator by modifying the decimal symbol for each paragraph style.
If you want to use different types of numeric formats in the same document, you can specify each format in a separate paragraph style and then assign the desired paragraph style to the appropriate text.
Printing in the Background
You can perform Ami Pro functions and commands while documents print if you use File Print and print in the background.
Ami Pro creates a temporary file in your temporary directory each time you print a document. The temporary file requires as much disk space as the original document.
Foreground editing tasks may be slower if you print in the background.
To print in the background
1. Choose Tools User Setup.
2. Choose Options.
3. Select Print in background.
4. Choose OK.
REXX Command File
You can execute a previously created REXX command file from within Ami Pro.
To play a REXX command file
1. Choose Tools Macros.
2. Choose Play REXX File.
3. Specify the name of the file you want to execute.
All REXX files must have a .CMD extension for Ami Pro to recognize them.
You can specify another drive and directory by selecting them in the list boxes or typing the full path in the Macro file text box.
4. Choose OK.
Ami Pro plays the REXX command file.
Corrections to the Documentation
Ami Pro User's Guide
On page 1, under "System requirements," the second bulleted paragraph should indicate "A minimum of 8MB of RAM (16MB recommended)."
On page 1, under "System requirements," the third bulleted paragraphs should indicate "A minimum of 8MB of available hard disk space. Depending upon the options you choose to install, you may need up to 17MB of available hard disk space."
On page 4, under "To start Ami Pro from the OS/2 Command Prompt," the list of commands should include the following commands:
amipro /a
Starts Ami Pro without running autoexec.smm.
amipro /e
Starts Ami Pro and minimizes it.
amipro /i=pathname ami*.ini
Starts Ami Pro using the settings stored in ami*.ini, found in the specified pathname.
amipro /l
Starts Ami Pro without displaying the splash screen.
amipro /n=iconset.smi
Starts Ami Pro and selects the SmartIcons set iconset.smi.
On page 17, the Help under the picture of an Ami Pro document should indicate "For additional information, refer to 'Assigning paragraph styles' in this chapter, 'Understanding frames' and 'Placing a picture in a document' in Chapter 16, and 'Understanding tables' in Chapter 17."
On page 19, the second paragraph under "Cancel" should appear under "Save As."
On page 22, under "To assign a paragraph style using fast format," the first step should be an introduction paragraph. The second step becomes step 1: "Place the insertion point in a paragraph that has the desired paragraph style formatting."
On page 24, under "To save an untitled document," the Save As dialog box should include a Files list box. The Files list box allows you to see if the file already exists. This makes it easier to use incremental file names (for example, test1, test2, test3).
On page 33, under "Using preview," the following bullet paragraphs should be deleted:
v Print the document.
v View the document information.
v Copy selected text to the Clipboard and paste it into another open document.
v Use Go To and Find & Replace to find information.
v Use any of the commands under the View menu.
v Move to the next or previous power field and display power fields.
On page 55, under "System time," the Help should indicate "The way the system time appears is determined by the time format specified in Country in the OS/2 System Setup folder. For information, refer to 'Changing date and time' in the OS/2 Master Help Index."
On page 62, under step 3, the last paragraph on the page should indicate "If you want to change back to the previous color, press CTRL+ click the mouse button anywhere in the color bar or box." This paragraph should be moved to just before step 3.
On page 69, the paragraph under "Overstrike" should indicate "The character you type in the text box appears on top of selected text." The Help paragraph about using a character from the current character set should be deleted. You cannot use ALT+ another key in a dialog box to insert a special character from the current character set.
On page 71, the Help at the top of the page should indicate "If you do not select any text, Ami Pro displays the Fast Format dialog box. Select Only text font and attributes and choose OK."
On pages 77, 79, 80, 81, 82, 84, 86, 87, 92, 94, and 95, the Mouse shortcut is incomplete. For information, refer to Mouse Shortcuts Using the Right Button section in this document.
On page 80, under "To modify paragraph style tabs," the first paragraph should indicate "You can specify left, right, numeric, center, and leader tabs. Ami Pro moves the insertion point to the tab position when you press TAB in the text."
On pages 95-97, under "To modify paragraph style table format," the documentation is incomplete. For information, refer to the Paragraph Style Table Format and Numeric Separator sections in this document.
On page 96, under "To use Numeric Format," a paragraph that indicates "Ami Pro also uses the Decimal symbol as the numeric separator whenever you create a numeric tab" should be added at the end of the section. For information, refer to the Numeric Separator section in this document.
On page 97, under the "To use Currency format" option, the Help paragraph should be deleted. You cannot use ALT+ another key to insert a special character into a dialog box.
On pages 106, 107, 108, 109, 112, and 114, the Mouse shortcut is incomplete. For information, refer to Mouse Shortcuts Using the Right Button section in this document.
On page 107, under "To modify page layout tabs," the first paragraph should indicate "You can specify left, right, numeric, center, and leader tabs. Ami Pro moves the insertion point to the tab position when you press TAB in the text."
On page 113, the Help at the top of the page should indicate "For information, refer to 'To use a ruler to modify left and right margins,' 'To use a ruler to modify page or frame columns,' and 'Using a ruler to modify tabs' in Chapter 8."
On page 118, under "To remove an inserted page layout," step 1 should indicate "Place the insertion point anywhere in the text using the inserted page layout." Placing the insertion point on the page layout mark to delete the inserted page layout does not delete it.
On page 119, under "To insert a manual page or column break," the third paragraph in step 3 should indicate "If you inserted a column break, Ami Pro places a column break mark at the location of the insertion point. Ami Pro moves any text beyond the location of the insertion point to the next column."
On page 126, under "Displaying and hiding rulers," a sentence that indicates "You can display the horizontal and vertical rulers only in Layout mode" should be added to the end of the paragraph.
On page 136, the Help under "Numeric tab" should indicate "The numeric separator is determined by the decimal symbol specified in the paragraph style." For information, refer to the Numeric Separator section in this document.
On page 136, under "To create or move a tab," the third paragraph under step 2 should indicate "In the Modify Style dialog box, choose Alignment to display the ruler, and select Use style tabs."
On page 138, under "To remove one or more tabs," the third paragraph under step 2 should indicate "In the Modify Style dialog box, choose Alignment to display the ruler, and select Use style tabs."
On page 146, under "Status of paragraph styles that are not available to a document," the first paragraph should indicate "If a paragraph style name appears in red (gray on a monochrome monitor) in the Style Status button, the insertion point is in text using a paragraph style that is not available in either the style sheet or the document."
On page 161, the last sentence in the paragraph under the picture of an Ami Pro document in draft mode should be deleted. You can create, cut, copy, or move a frame in draft mode.
On pages 165, 167, and 168, the screen capture of the User Setup dialog box should not contain the "Disable warning messages" option.
On page 166, under "Auto timed save," all references to ".TIM file" should be replaced with ".~TS file."
On page 166, under "Auto timed save," the Caution should indicate "Ami Pro does not implement auto timed save when you use Image Processing or Equations or when you are in a document that is read-only."
On page 168, under "To set help message options," the documentation for the "Disable warning messages" option should be deleted. Ami Pro does not display a warning message when you delete text that contains notes, page breaks, footnotes, page tables, floating headers or footers, inserted page layouts, anchored frames, DDE links, or power fields.
On page 168, the screen capture of the User Setup dialog box should not contain the "Display initials in text" option.
On page 169, the "Display initials in text" paragraph should be deleted.
On page 169, under "To set typographic options," the screen capture of the User Setup dialog box should not contain a pair kerning option.
On pages 171-172, under "To set speed options," the documentation fails to mention the Print in background speed option. The screen capture of the User Setup dialog box should include the Print in background option. The documentation for Print in Background should indicate "Select Print in background to perform Ami Pro functions and commands while documents print if you use File Print. Ami Pro creates a temporary file in your temporary directory each time you print a document. The temporary file requires as much disk space as the original document. Foreground editing tasks may be slower if you print in the background."
On page 172, under "Graphic display speed options," the second paragraph about the Select Save option should be deleted. Ami Pro has only two Graphic display speed options available, Save for Fast Display and Conserve Disk Space.
On pages 174-175, under "To set load defaults," the documentation fails to mention the clean screen option. Step 3 should indicate "Select Clean screen to display only the parts of the window you selected in the View Preferences Clean Screen dialog box" and the remaining steps should be renumbered.
On page 178, under "Notes," the Help paragraph should indicate "You can specify the initials and color you want to use for the notes you create in a document. For information, refer to 'To set notes options' in this chapter." You cannot specify whether or not the initials should display in the text.
On page 178, under "Horizontal scroll bar," the paragraph should indicate "Select Horizontal scroll bar to display a horizontal scroll bar at the bottom of the window in Layout mode."
On page 184, under "Accessing outline mode," the second Help should indicate "For information about frames, refer to 'Editing a frame' in Chapter 16."
On page 193, under "Understanding outline numbering," the Note should be deleted. Paragraph style names are case-sensitive. For example, Ami Pro would not recognize Heading and heading as equivalent paragraph style names.
On page 194, under "To use I, A, 1, i, a," the documentation fails to mention that you should not use Cumulative numbering when using this quick numbering scheme. If you use Cumulative numbering with this quick numbering scheme, Ami Pro does not number the outline paragraph styles correctly.
On page 196, under "To use Cumulative numbering," the documentation fails to mention that you should not use the I, A, 1, i, a quick numbering scheme with Cumulative numbering. If you use Cumulative numbering with this quick numbering scheme, Ami Pro does not number the outline paragraph styles correctly.
On page 204, under "Understanding text streams," step 4 should indicate "Text in page tables, notes, and anchored frames (frames that have the frame Placement in the Modify Frame Layout dialog box set to With paragraph above or Flow with text)."
On page 205, under the "Check from beginning of document" option, the paragraph indicating "If the insertion point is in any text stream other than main document text, Ami Pro automatically deselects and dims this option" should be deleted.
On page 206, under the "Include other text streams" option, the paragraph preceding step 3 indicating "If the insertion point is in any text stream other than main document text, Ami Pro automatically selects and dims this option" should be deleted.
On page 210, the Example of editing the user dictionary should be deleted. The user dictionary is not case sensitive; therefore, the user dictionary does not recognize Berger and BERGER as separate entries.
On page 212, under the "Check from beginning of document" option, the paragraph indicating "If the insertion point is in any text stream other than main document text, Ami Pro deselects and dims this option" should be deleted.
On page 212, under the "Include other text streams" option, the paragraph indicating "If the insertion point is in any text stream other than main document text, Ami Pro selects and dims this option" should be deleted.
On page 213, under "To correct an error," the documentation should indicate "Choose Cancel to exit the Grammar Checker dialog box. Click in the document, make the desired changes, and restart Grammar Check."
On page 213, under "Resume," the first paragraph should indicate "Checks the sentence in which the insertion point is located. Resume replaces the Skip button if you clicked in the document."
On page 217, under "Save As," a sentence that indicates "The changes you specify take effect only after you exit and re-enter the Grammar Check dialog box" should be added to the end of the second paragraph.
On page 219, in Chapter 14, Printing a Document, the documentation fails to include printing in the background. For information, see the Printing in the Background section in this document.
On page 230, under "To type and print an address on an envelope," the screen capture of the Recipient's Address dialog box should be deleted. The dialog box does not display at this time.
On page 235, under "Using a picture," the fourth paragraph should indicate "A repeating frame displays on all pages in the document even if you insert one or more new page layouts. However, if you insert a new page layout, the picture in a repeating frame does not display in the frame in the new page layout. You can import the picture again or import a different picture in the repeating frame for the new page layout. You can also delete the frame in the new page layout without deleting the frame in the previous page layout."
On page 235, at the end of "Using a picture," the documentation should include a paragraph that indicates "If you create a frame in the header or footer, you cannot use the Wrap around option in the Modify Frame Layout dialog box to wrap text beside the frame. If you want text to wrap beside the frame, you can use Text Indention to indent the text, or you can display the Modify Style dialog box, choose Alignment, and modify the indention of the paragraph style." The documentation should include a Help paragraph that indicates "For information, see 'Applying an indention' in Chapter 5 and 'To modify paragraph style indentions' in Chapter 6."
On page 243, under "To modify a floating header or footer," the OK command button in the screen capture of the Go To dialog box should be a Go To CTRL+H command button.
On page 244, under "To modify a floating header or footer," step 3 should indicate "Choose Go To CTRL+H."
On page 244, under "To remove a floating header or footer," the OK command button in the screen capture of the Go To dialog box should be a Go To CTRL+H command button.
On page 244, under "To remove a floating header or footer," step 3 should indicate "Choose Go To CTRL+H."
On page 244, under "To remove a floating header or footer," the Help paragraph should be deleted. When using Go To, Ami Pro does not display a message if the insertion point is on the last occurrence of the item you selected.
On page 245, under "Copying and moving text that contains a mark," the Help should be deleted. A message does not display when you cut or move text that contains a floating header or footer mark.
On page 271, under "To use Repeat all pages," the Note should indicate "A repeating frame displays on all pages in the document even if you insert one or more new page layouts. However, if you insert a new page layout, the contents in a repeating frame do not display in the frame in the new page layout. You can re-enter the contents or create new contents in the repeating frame for the new page layout. You can also delete the frame in the new page layout without deleting the frame in the previous page layout."
On page 283, under "Frame 6," the paragraph should include the sentence "The top margin of the frame is set to .39 inches."
On page 283, under "Frame 7," the last sentence of the paragraph should indicate "The frame layout is set to no wrap around and no lines (so the title displays as if it were part of the box)."
On page 297, under "To use editing Options," the first sentence in the first Help paragraph should be deleted. You can select Honor protection before protecting the desired cells.
On page 302, under "To create an equation in a table," the SmartIcon to access Equations did not ship with Ami Pro for OS/2 release 3.0. To access Equations, choose Tools Equations.
On page 309, under "To move or copy a table," the first Help should indicate "For information, refer to 'Editing a frame' in Chapter 16."
On page 318, under "To connect cells," the first line in step 2 should indicate "Choose Table Connect."
On page 318, under "To connect cells," a sentence that indicates "You can use Undo to unconnect the cells and keep any contents or cell formatting you previously had in that cell" should be added just before "To disconnect cells."
On page 318, under "To disconnect cells," the paragraph should indicate "Place the insertion point in the connected cell and choose Table Disconnect. The former cell reappears without any contents or cell formatting you previously had in that cell."
On page 319, under "To protect cells," the second paragraph under step 2 should be replaced with a Help paragraph that indicates "To protect cells, you must also select Honor protection in the Modify Table Layout dialog box and deselect Disable table cell protection in the Document Information dialog box. For information, refer to 'To specify the table layout' in this chapter and 'To use document information' in Chapter 21." Steps 3 - 5 should be deleted.
On page 324, under "Using a page break in a table," step 1 for "To remove a page break" should indicate "Place the insertion point in any cell in the row immediately above the page break." You cannot remove a page break with the insertion point in a row immediately below the page break.
On page 334, the OK command button in the screen capture of the Go To dialog box should be a Go To CTRL+H command button.
On page 334, the first sidenote that indicates " Ami Pro dims any item that is not available" should be deleted. Ami Pro does not dim items that are not available.
On page 334, under "Footnote Mark," the documentation should indicate "Selects the next footnote reference number in the document. Before you type text, move the insertion point so that the footnote mark is not highlighted."
On page 335, the Go To options should include "Note When you select Note in the list box, Ami Pro places the insertion point at the location of the note mark. Double-click the note mark to display the note."
On page 335, step 2 should indicate "Choose Go To CTRL+H."
On page 335, under step 2, the Help paragraph should be deleted. When using Go To, Ami Pro does not display a message if the insertion point is on the last occurrence of the item you selected.
On page 335, under "Using find & replace," the last paragraph on the page should indicate "If you are in Draft Mode when you select Find & Replace, Ami Pro only searches the main document text."
On page 336, under the screen capture of the Find & Replace dialog box, the documentation should indicate "To use Options and Attributes" instead of "To use Options and Picture."
On page 339, under the "Check from beginning of document" option, the third paragraph indicating "If the insertion point is in any text stream other than main document text, Ami Pro deselects and dims this option" should be deleted.
On page 339, under the "Include other text streams" option, the third paragraph indicating "If the insertion point is in any text stream other than main document text, Ami Pro selects and dims this option" should be deleted. A paragraph indicating "If you are in Draft Mode when you select Find & Replace, Ami Pro selects and dims this option" should be added. Ami Pro only searches the main document text in Draft Mode.
On page 341, under "To set find and replace attributes," the second Help paragraph should indicate "For information, refer to 'To find and replace text' in this chapter."
On page 341, under "To find and replace a paragraph style," the first paragraph should indicate "You can find and replace a paragraph style when you want to assign a different paragraph style to text, including changing text to a paragraph style you just created." You cannot delete a paragraph style.
On page 348, the section "To find and replace special characters" should be deleted. You cannot use ALT+ another key in a dialog box to insert a special character from the current character set.
On page 349, under "To move to the next text bookmark," step 3 should indicate "Choose Go To CTRL+H."
On page 350, under "Using line numbering," the documentation is incomplete. For information, refer to the Line Numbering section in this document.
On page 351, under "Understanding importing and exporting," the first sentence in the fourth paragraph that indicates "Some text filters display dialog boxes that allow you to specify how you want to import or export a file" should be deleted.
On page 352, the "Import file filters" list should include:
v 1-2-3 releases 1.x and 4.x for Windows and OS/2 (.WK3, .WK4, and .WG2)
v DCA/FFT (Final Form Text)
v Excel releases 2.x, 3.x, and 4.x for Windows and OS/2
v WordStar 5.0
On page 352, the "Export file filters" list should include:
v DCA/FFT
v WordStar 5.0
On page 354, under "To insert a file," the second paragraph should indicate " You can insert a word processing file into main document text, a text frame, or a table. You can insert a database or spreadsheet file into main document text or a frame."
On page 356, under "Converting text and page formatting information," the third paragraph should indicate "If you insert an Ami Pro document into an empty document, Ami Pro uses the page layout from the inserted document. If you insert an Ami Pro document into a document that has text in it, Ami Pro inserts a page layout at the location of the insertion point and maintains any inserted page layouts in that document. At the end of the inserted document, Ami Pro inserts a page layout that reverts to the page layout in effect at the location of the insertion point."
On page 356, under "Inserting a file into a table," the information is incorrect. For information, refer to the Inserting a Word Processing File and Inserting a Spreadsheet or Database File sections in this document.
On page 357, under "Inserting a file into a text frame," the information is incorrect. For information, refer to the Inserting a Spreadsheet or Database File section in this document.
On page 358, the last paragraph should indicate "Ami Pro saves the document to the file name you specify and displays the new document with the new name in the Ami Pro window."
On page 359, under "Using document information," the first paragraph should indicate "You can use document information to identify the contents of a document and specify table, revision marking, and frame macros options."
On page 367, under "To use Mark Deletions As," the Help paragraph should be deleted. You cannot use ALT+ another key in a dialog box to insert a special character from the current character set.
On page 367, under "To use Revision Marks in Margin," the second paragraph indicating "You can type any character in the current character set" should be deleted. You cannot use ALT+ another key in a dialog box to insert a special character from the current character set.
On page 370, under "Using notes," the first bulleted paragraph should indicate "Choose Tools User Setup and specify the desired initials and color for the notes he or she creates." The User Setup dialog box does not contain a Display initials in text option.
On page 371, under "To remove a note without displaying the note window," the Help in step 2 should be deleted. Ami Pro does not display a message when you remove a note.
On page 371, under "To remove a displayed note," the first paragraph in step 2 should indicate "Press BACKSPACE."
On page 376, under "To use Options," the first paragraph should indicate "Choose Options, specify the desired footnote and separator line options, and choose OK."
On page 378, under "To go to the next footnote reference number," a sentence that indicates "Before you type text, move the insertion point so that the footnote mark is not highlighted" should be added to the end of the second paragraph in step 4.
On page 391, the sidenote paragraphs that refer to the Document Path button in the "To find index entries" and "To find all occurrences of a particular index entry" sections should be deleted.
On page 394, under "Using glossary," the documentation fails to discuss how to modify a glossary record. For information, refer to the Glossary Record section in this document.
On page 395, under "To create a glossary data file," the first paragraph in step 9 should indicate "For the next paragraph, type an ID name for the first record, followed by the field delimiter. You must use alphanumeric characters for the ID name." You cannot use nonalphanumeric characters in the ID name for a glossary record.
On page 410, the screen capture of the Send Mail dialog box should indicate a titled document. If the current document is untitled when you choose File Send Mail, the Attach option is Save and attach.
On page 410, under "To check your mail," the paragraph should indicate "Ami Pro notifies you when you receive mail if Lotus Notes is loaded. If you receive mail, Ami Pro displays a Mail Notification button in the status bar. You can check your mail by clicking the Mail Notification button."
On page 412, under "Opening a document that contains DDE links," the first paragraph should indicate "You can open a document that contains DDE links and update the links. You must start the other application and open the source file that contains the information. In the Ami Pro document, choose Edit Link Options and choose Update." A message does not display asking you if you want to update the links, and Ami Pro does not automatically start the application that contains the original information.
On page 416, under "Using paste special," the second bulleted paragraph should indicate "When you paste text, Ami Pro uses either Ami Pro Format, Rich Text Format, Text, or OS/2 Metafile, in that order."
On pages 416-417, under "Using paste special," disregard all references to the Device Independent Bitmap (DIB) format. Ami Pro for OS/2 does not support pasting information in the DIB format.
On page 417, under the screen capture of the Paste Special dialog box, the documentation fails to mention the Ami Pro Format, a text format that maintains Ami Pro paragraph style and text formatting information.
On pages 422-424, under "To use File Merge to create a merge data file," the documentation fails to mention that you must choose New in the Select Merge Data File dialog box before you can name the merge data file. For information, refer to To use File Merge to create a merge data file in the Merge Data File section in this document.
On page 428, under "Creating a merge document," the last paragraph should indicate "Ami Pro provides a merge letter style sheet, _MERGLET.STY, that already contains merge fields. If you used _MERGDAT.STY to create the merge data file, you can use _MERGLET.STY as the merge document."
On page 428, under "To assign a merge data file to a merge document," the documentation for "To assign a merge data file if you just closed that data file" is incorrect. For information, refer to To assign a merge data file if you just closed that data file in the Merge Data File section in this document.
On page 443, under "Modifying a merge data file," the paragraph should indicate "You can modify an Ami Pro merge data file by editing the data or modifying the field names. You can also insert and rename field names in a merge data file and change the field information that displays in the tab dividers."
On page 445, the screen capture of the Field Management dialog box should include the Insert and Rename command buttons and the Index field list box.
On page 446, under "To modify a merge field name," step 5 should indicate "In the Index field list box, select the field that has the information you want to display in the tab dividers. You can either click the arrow or press the down arrow when the insertion point is in the list box to display a list of Index field names." The remaining steps should be renumbered.
On page 448, merge envelopes is not available.
On page 449, under "Using the Ami Pro file manager," the information in the first paragraph about the File Manager providing options for displaying document information should be deleted.
On page 450, under "To copy or move a file," the last Help paragraph should be deleted. Document Information is not available for viewing.
On page 455, the "To view document information" section should be deleted. The File Manager does not provide an option for displaying document information.
On page 458, under "Accessing equation mode," the SmartIcon to access Equations did not ship with Ami Pro for OS/2 release 3.0. To access Equations, choose Tools Equations.
On page 464, under "To create an equation," the SmartIcon to access Equations did not ship with Ami Pro for OS/2 release 3.0. To access Equations, choose Tools Equations.
On page 465, under "To insert a symbol using the Symbol keyboard," the Equation Symbol Keyboard table should indicate:
v Press 9 or 0 to insert
v Press ( or ) to insert
v Press c to insert
v Press E to insert
On page 480, under "To record a quick macro," step 4 should indicate "Choose Tools Macros and then choose Stop Recording."
On page 481, under "Example of a quick macro," the fourth paragraph from the bottom of the example should indicate "Choose Stop Recording."
On page 482, the callout for the screen capture of the Quick Record Macro Options dialog box should indicate "Type the shortcut keys you want to assign to the quick macro."
On page 482, under the screen capture of the Quick Record Macro Options dialog box, the paragraph should indicate "You can use either CTRL or SHIFT, or a combination of the two, with most keys. When assigning a shortcut, you must spell out the shortcut command keys. For example, to assign SHIFT+F2, you must type the actual alphanumeric characters with no spaces. You cannot use F10, SHIFT+F1, or SHIFT+ an alphanumeric key."
On page 483, the callout for the Playback shortcut keys field on the screen capture of the Record Macro dialog box should indicate "Type the shortcut keys you want to assign to the macro."
On page 483, under "To record a macro," step 5 should indicate "Choose Tools Macros and then choose Stop Recording."
On pages 483, under "Playing a macro," the documentation fails to discuss the Play REXX File option. For information, refer to the REXX Command File section in this document.
On page 484, the callout for the Playback shortcut keys field on the screen capture of the Play Macro dialog box should indicate "Type the shortcut keys you want to assign to the macro."
On page 485, under "Example of a macro," the third paragraph from the bottom of the example should indicate "Choose Tools Macros and choose Stop Recording."
On page 485, the callout for the Playback shortcut keys field on the screen capture of the Edit Macro dialog box should indicate "Type the desired shortcut keys."
On page 485, under the screen capture of the Edit Macro dialog box, the paragraph should indicate "You can use either CTRL or SHIFT, or a combination of the two, with most keys. When assigning a shortcut, you must spell out the shortcut command keys. For example, to assign SHIFT+F2, you must type the actual alphanumeric characters with no spaces. You cannot use F10, SHIFT+F1, or SHIFT+ an alphanumeric key."
On pages 488-489, the documentation for "Debugging a macro file" is incorrect. For information, refer to the Debug Macro File section in this document.
On page 506, under "Editing a power field," the Help should be deleted. A message does not display if you select text containing a power field and choose Edit Cut.
On page 507, under "To display a power field," the Help should be deleted. A message does not display if you select a power field and choose Edit Cut.
On page 516, under "Creating an automated style sheet," the last sentence in the third paragraph should indicate "You can also use the SmartFields menu to indicate where you want to begin typing."
On page 517, under "To create an automated style sheet," the last sentence in the first paragraph should indicate "You can also use the SmartFields menu to indicate where you want to begin typing."
On page 519, step 10 and the Help should be deleted, and the remaining steps should be renumbered.
On page 520, the documentation for "To repeat SmartFields" should be deleted. You cannot have SmartFields appear in multiple locations.
On page 521, the documentation for "To add an automated frame" should be deleted. You cannot add automated frames when you create or modify an automated style sheet.
Ami Pro Quick Reference Card
Under Status Bar Shortcuts, the Shortcut for Change type of information displayed should indicate "Click the Document Path button to switch between the path, the date and time, and the position of the insertion point."
Under Mouse Shortcuts, the documentation should indicate:
Do this for Copy Text
Select text, position the mouse pointer in the text, press CTRL+ the right mouse button, and drag the copy arrow.
Do this for Move Text
Select text, position the mouse pointer in the text, and use the right mouse button to drag the move arrow.
Do this for Modify frame layout
Position the mouse pointer over the frame and click the right mouse button.
Do this for Modify page layout
Position the mouse pointer in the left or right margin area and click the right mouse button.
Under Using Frames, the documentation should indicate:
Create a frame
Click the Add a frame icon. Move the frame arrow to the desired position on the page. Drag the frame arrow until the frame is the desired size.
Modify a frame's contents
Position the mouse pointer inside the frame and double-click.
Move a frame
Select frame. Position the mouse pointer on any frame edge and use the right mouse button to drag the arrow until the frame is in the desired position.
Size a frame
Select the frame. Position the mouse pointer on any frame handle and drag the sizing arrow until the frame is the desired size.
Ami Pro Style Sheet Guide
On page 11, the documentation for the _CALDAY.STY automated style sheet should be deleted. Ami Pro does not provide an automated style sheet for a daily calendar.
On page 13, the documentation for the _CALWK.STY automated style sheet should be deleted. Ami Pro does not provide an automated style sheet for a weekly calendar.
Upgrading from Ami Pro for Windows
v You can create a macro in Ami Pro for Windows, open the macro in Ami Pro for OS/2, and play or edit the macro. However, before using the macro in Ami Pro for Windows again, you must open and save the macro while in Ami Pro for Windows. If you don't, the macro will not function correctly. For information, refer to "To edit a macro file" in the Ami Pro User's Guide.
v The following features are not available in Ami Pro for OS/2:
Sorting
Drawing
Charting
Merge Labels
Protect Text
OLE
Pair Kerning
Outline Styles
v You can insert a tab into a table cell by pressing CTRL+TAB.
v Units of measurement can now be set globally in User Setup. You can select a different unit of measurement for line and paragraph spacing.
v Text and graphic import and export filters have changed.
v The Print options have changed.
v Ami Pro has changed the way it automatically saves files.
v The Notes functionality has changed.
v The Document Information options have changed.
v When you combine Ami Pro files, Ami Pro now maintains additional formatting.
v Anchored and Wrap around frames appear differently.
v Font differences between Ami Pro for Windows and Ami Pro for OS/2, may cause the pages to flow differently.
v When generating a table of contents, you must specify an output file. |


Add new comment